How to Line Up 3D Printed Parts: Techniques for Perfect Assembly
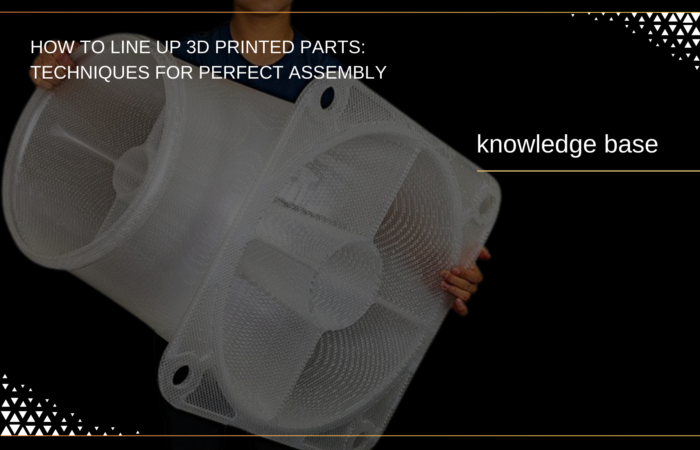
Aligning 3D-printed parts is more than just a final step—it’s what transforms your prints into something functional and precise. Whether you’re assembling a prototype, a multi-piece model, or a mechanical component, proper alignment is essential.
But here’s the catch: it’s not always as straightforward as snapping pieces together. Warping, mismatched tolerances, or even small design oversights can throw things off.
Here’s where smart tactics come in handy. From design planning to using the right tools, aligning components doesn’t have to be a trial-and-error process.
This guide will teach you how to:
✅ Design for exact alignment by utilizing features like interlocks or pins.
✅ Use post-processing techniques to enhance your prints.
✅ Carefully assemble and bond components.
So, let’s get started with how to line up 3d printed parts for product longevity and visual appeal!
Why Proper Alignment Matters
Whether you’re constructing functional prototypes, mechanical components, or consumer items, the accuracy you get from precise alignment can affect the performance and durability of your products.
For example, in aircraft production, where strict tolerances are critical, precise alignment guarantees that moving components operate smoothly and without friction or failure.
In medical device manufacturing, properly aligned components can improve the accuracy of prototypes or functional models, which has a direct influence on patient safety.
By developing your alignment abilities, you may improve the appearance of your prints while also increasing their reliability and efficiency for their intended application.
Good alignment guarantees:
- Structural integrity: Parts fit firmly and endure longer.
- Optimal functionality: Moving parts operate as planned, with no defects.
- Clean aesthetics: Your project will appear polished and expert thanks to seamless joins.
Both functionality and appearance may be jeopardized by gaps, uneven surfaces, or weak joints. Inadequate alignment of mechanical parts can cause wear, friction, or complete failure while in use.
Diagnosing And Troubleshooting Print Lines & Extruder Clicking
When it comes to 3D printing, issues like print lines, extrusion inconsistencies, and extruder clicking can be frustrating, but they are common problems that can usually be resolved with a few checks. Whether you’re dealing with visible print lines or extruder clicking mid-print, these problems might arise from factors like extruder calibration, print speed, or material settings.
Common Troubleshooting Tips:
- Extruder Settings: Ensure that the extruder gear is correctly aligned and calibrated. If you’ve upgraded to a dual-gear extruder, double-check that the filament flow rate matches the manufacturer’s recommended setting (typically in mm/min).
- Temperature Settings: Run temperature tests for your filament. PLA typically prints at lower temperatures compared to materials like PETG, which requires a slightly higher temperature for proper extrusion.
- Speed Consistency: Maintaining a consistent printing speed throughout each layer is essential. Variations in speed, especially when changing speeds frequently, can lead to extruder clicking or inconsistent extrusion.
- Clogs: A clogged hotend can stop extrusion, causing print failures. Make sure the nozzle is clean and free of obstructions.
- Extruder Gear: Ensure the extruder gear isn’t worn down or misaligned, which can hinder filament flow and lead to issues like clicking or filament slipping.
If you notice extrusion failure or Z-seam issues, check for alignment problems in the filament feed or the extruder itself. It’s important to solve these issues early to avoid wasting material and time.
Tools You'll Need for Aligning 3D Printed Parts
Having the right tools makes alignment easier and more precise.
Here’s a quick checklist of essentials:
Tool | Purpose |
Clamps | Keep parts steady while adjusting and gluing. |
Sandpaper or files | Smooth out imperfections for a snug fit. |
Adhesives | Choose glue or resin that bonds well with your material. |
Alignment guides | Use templates or jigs to ensure consistent positioning. |
Rulers or calipers | Measure accurately to avoid misalignment. |
Align the Parts Precisely
Once the tools are out of your 3D printer, it’s time to practice lining up 3d printed parts. Begin by arranging your components on a level, firm surface. To achieve symmetry, measure distances with a ruler or caliper. If you’re dealing with many pieces, dry-fit them first to check for gaps or abnormalities.
For curved or intricate designs, alignment guides like jigs or templates can save time and effort. Secure each part with clamps, but avoid overtightening to prevent damage. Make small adjustments as needed, checking your measurements along the way. Precision now will save you from headaches later.
Take your time during this step—accuracy is key to a seamless final product.
Bond The Parts Securely
It’s time to bond the components after they have been aligned. Selecting an adhesive that is appropriate for your material should be your first step; resin, super glue, or specialty 3D printing adhesives typically work well. Cover the surfaces you’re joining with a thin, even coating.
Make sure the components stay perfectly aligned by gently but firmly pressing them together. To keep them stable while the adhesive cures, use weights or clamps. To keep control over complicated joins, work in sections.
Be patient; the type of adhesive will affect the curing time. You risk weakening the bond and jeopardizing your project if you rush this step. Check the join for any gaps or uneven edges after the adhesive has set. If necessary, use more adhesive to reinforce weak areas.
This structure makes key actions and concepts easier to locate at a glance while keeping the message clear and actionable.
Print with quality equipment for better results. Check out the KINGS 1450PRO SLA 3D printer with financing now!
Dealing With Z Seams And Vertical Lines
Vertical lines, or Z seams, are common in prints with circular or cylindrical features. They appear where the extruder starts and stops for each layer. While difficult to eliminate completely, you can minimize their visibility by:
- Adjusting the seam position in your slicer settings, setting it to “Random” to disperse the seam around the object.
- Increasing the outer wall speed and reducing inner wall speeds for smoother transitions.
Solving Extruder Clicking And Print Failures
If your extruder starts clicking or extrusion stops midway through a print, it may be due to a misalignment or obstruction in the filament feed path. Here are common solutions:
- Check for clogs: A clogged hotend can cause extrusion to fail mid-print.
- Adjust the extruder gear: Ensure the gear isn’t worn down or misaligned.
- Dual-gear extruder: Switching to a dual-gear system improves filament grip and prevents slipping.
Check And Modify For Optimal Alignment
Once your parts are bonded, the next step is to check the fit. Inspect the parts to ensure everything is aligned correctly. Look for gaps, misalignment, or uneven bonding—minor adjustments at this stage can make a big difference.
If needed:
- Apply Pressure: Use clamps or gently adjust the components while the glue is curing to ensure a snug fit.
- Sanding: If there are any misalignments, sand the edges to improve the overall fit and finish.
These final tweaks will enhance the appearance and functionality of your 3D print, ensuring a seamless product.
Finishing Touches for a Seamless Look
Once your parts are bonded, it’s time to smooth out any imperfections. Sanding or filing the seams will help create a cleaner, more seamless appearance. Start with coarse sandpaper to remove any rough spots, then switch to finer grits for a smooth finish. Be gentle to avoid damaging the surface of the part.
If there are any visible gaps or rough edges, use filler or putty to fill them in, then sand again to level everything out. For a professional finish, consider applying a primer before painting, especially if the parts will be exposed to wear or weather.
The final touches enhance the visual appeal and ensure your 3D printed parts fit together smoothly, with a clean, seamless look.
Check and Modify for Optimal Alignment
Before finalizing, it is essential to test and fit the parts after they have been glued and completed. Check for any gaps, misalignment, or uneven bonding while holding the components together. At this point, minor changes can have a significant impact on the outcome.
If you notice any issues, you may apply more pressure with clamps or gently adjust the components while the glue is still curing. Sanding the edges again may help improve the fit for greater misalignments.
When the components are exactly aligned, which is achieved by testing and adjusting, the end result is a more functional and visually beautiful product.
Final Finishing Touches
Once your pieces have been aligned and bonded, it’s time to focus on the final details. This involves sanding, painting, and putting protective coatings to the 3D-printed component. Sanding is necessary to smooth out seams and make the transition between components undetectable.
Use finer grit sandpaper to achieve a smooth surface, and if needed, apply a primer before painting for a more polished finish. For additional durability, consider using a clear coat or other protective layer, especially for functional parts that will be exposed to wear.
These last touches enhance the appearance and increase the longevity and performance of your 3D-printed assembly.
Take a look at a brief tutorial to make sure your printed parts are good to go
If you notice any issues, you may apply more pressure with clamps or gently adjust the components while the glue is still curing. Sanding the edges again may help improve the fit for greater misalignments.
When the components are exactly aligned, which is achieved by testing and adjusting, the end result is a more functional and visually beautiful product.
Bringing Everything Together
Lining up 3D printed parts requires precision, patience, and the right tools. By planning ahead, using proper alignment techniques, and ensuring a snug fit, you can create smooth, functional assemblies. Whether you’re working on a prototype or a client project, getting alignment right is essential for success.
If you notice any issues, you may apply more pressure with clamps or gently adjust the components while the glue is still curing. Sanding the edges again may help improve the fit for greater misalignments.
When the components are exactly aligned, which is achieved by testing and adjusting, the end result is a more functional and visually beautiful product.
At Additive Plus, we specialize in helping clients smoothly transition to 3D technologies. With over a decade of experience and a curated portfolio featuring top brands like Farsoon Technologies, Kings3D, we offer high-quality solutions such as 3D printers, 3D scanners, materials, and other products for every project.
Need expert advice or top-tier equipment?
Get a quote today and see how Additive Plus can help accelerate your next project!
FAQ
How to line up 3D printed parts for a flawless assembly?
For a successful alignment, design parts with features like interlocks, pins, or dovetails to aid in assembly. Use precision tools such as rulers, calipers, and alignment jigs to measure and adjust the fit. Dry-fit your components before applying adhesive to make sure they align perfectly, saving you time and potential rework.
How can I prevent lines from appearing in 3D printing?
To reduce visible lines in your prints, consider adjusting your printer settings, such as layer height and print speed. Also, quality filament can make a significant difference. After printing, sanding the surface with fine-grit sandpaper or using primer can help eliminate lines and provide a smooth finish.
How to make lines go away in 3D printing once the part is printed?
To smooth out lines, start with sanding using coarse paper, followed by finer grits for a polished look. For a seamless finish, apply a filler or resin to fill in lines or gaps before sanding again. This technique helps create a professional appearance, especially for parts requiring high precision.
How do I ensure perfect alignment when working with multiple 3D printed parts?
When working with larger assemblies, use alignment guides or templates to ensure each part fits accurately. Before bonding, always perform a dry fit to check for gaps or misalignments. If any discrepancies are found, fine-tune the fit using calipers or small adjustments to correct the positioning.
How to line up 3D printed parts when dealing with complex geometries or large models?
For complex or oversized prints, consider subdividing the model into smaller parts that are easier to align and assemble. Use jigs and alignment pins to hold parts steady during the assembly process. Patience is key—take time to ensure each part fits before securing with adhesive.
What adhesive should I use to bond 3D printed parts for maximum strength?
Choose an adhesive that suits your material—super glue for smaller parts, or epoxy and specialty 3D printing adhesives for larger, more complex assemblies. Ensure the surfaces are clean and dry before applying a thin, even layer of glue. Use clamps or weights to hold the parts in place during curing to ensure a strong bond.
How do I check and adjust for misalignment after bonding 3D printed parts?
Once your parts are bonded, inspect the alignment by checking for any visible gaps or uneven surfaces. If misalignment occurs, you can still make small adjustments while the adhesive is curing. For larger misalignments, sanding or using a new layer of adhesive can help correct the fit.
How to avoid weak bonds in 3D printed parts when aligning and assembling?
To ensure a strong bond, be sure to use the right adhesive for your material. Also, avoid rushing the curing process—give the adhesive time to fully bond. For added strength, reinforce joints with additional adhesive or pins for more support, particularly when working with high-stress parts.
Explore What’s New in 3D Printing
How to Clean a 3D Printer Nozzle: Easy Steps for Optimal Performance
Can You 3D Print Metal? A Comprehensive Guide to Metal 3D Printing Technologies
3D Printing for the Medical Industry: A Review of Essential Technologies and Trends
How Long Do Resin 3D Prints Last? Factors Affecting Durability and Longevity in 3D Printing
How Can LFAM Boost Efficiency and Flexibility in the Automotive Industry?
Related Posts