Skip to content

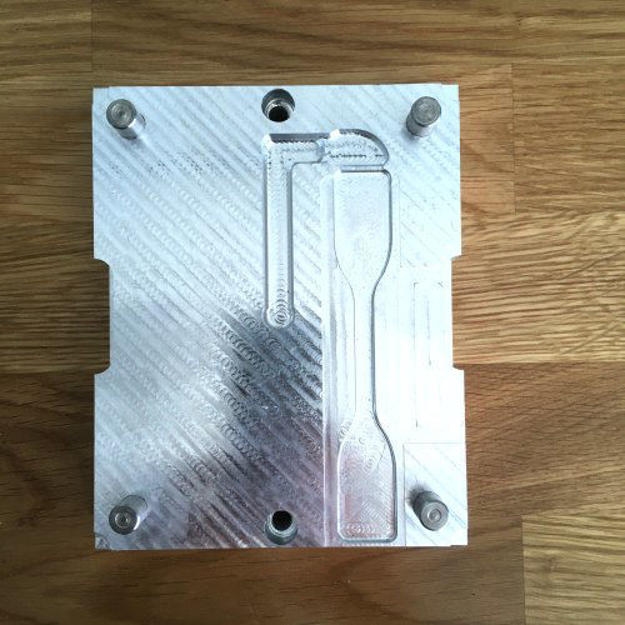
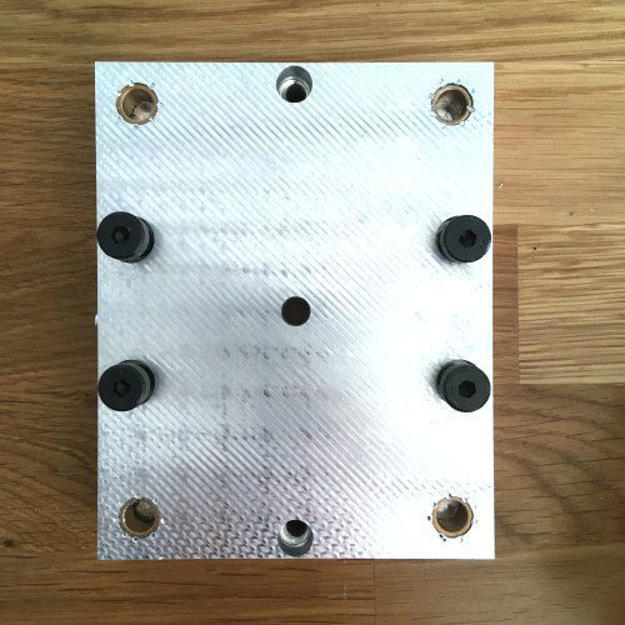
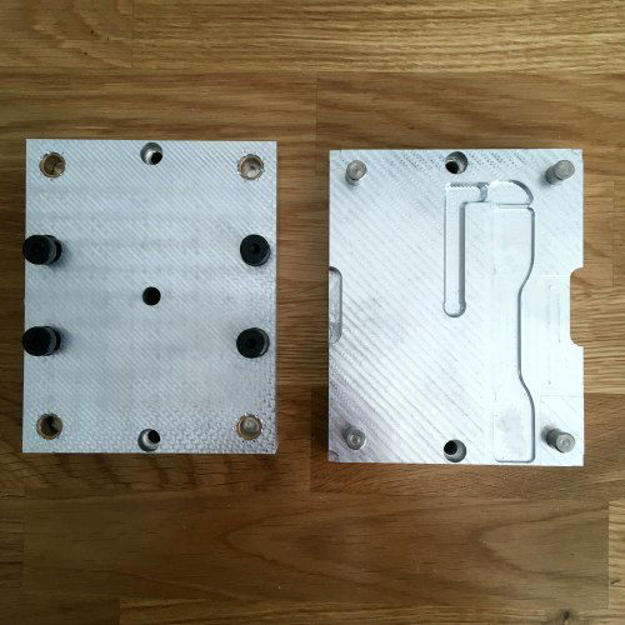
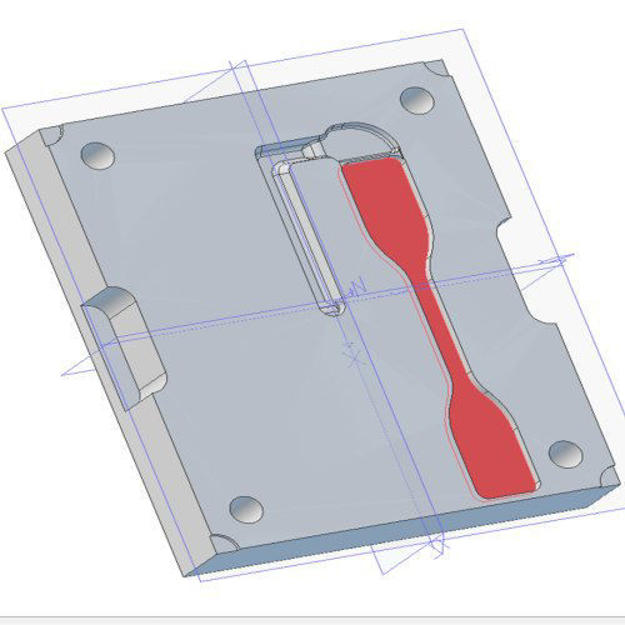
ASTM D638 Type IV Tensile Test Mold

$1,750

Standard size 6061 aluminum mold machined by the Spyder CNC for the APSX-PIM.

  • Platform:

    FIM

  • In stock

$1,750

Request a quote
  • Description
  • Details
  • Materials
  • Documents
  • Videos
  • Review

Description

This pre-assembled aluminum mold is engineered for producing standard ASTM D638 Type IV tensile test specimens. Designed for seamless integration with the APSX-PIM machine, it includes all necessary mounting hardware for immediate operation.


Product Overview & Specifications

  • Mold Dimensions: 4.8″ (W) × 6.0″ (H) × 2.0″ (D)

  • Test Specimen Produced: ASTM D638 Type IV Tensile Bar

  • Part Dimensions: 4.75″ (L) × 0.75″ (W) × 0.125″ (Thick)

  • Included Components: Pre-installed alignment pins & bushings, four (4) shoulder bolts, one (1) set of clamping claws.

  • Note: Multiple mold orders include only one set of claws to be shared between frames.


Key Features & Benefits

  • Ready for Production: Arrives fully assembled with all pins, bushings, and hardware installed. Simply mount and begin molding.

  • Active Thermal Management: The specifically designed longer shoulder bolts create a passive cooling gap between the mold and the nozzle plate until the machine is fully clamped. This design significantly improves thermal stability and cycle time by reducing heat transfer.

  • Precision Engineering: Tight-tolerance pins and bushings guarantee perfect mold alignment for consistent, high-quality, and flash-free test specimens every time.


Installation & Alignment Procedure

  1. Mounting:

    • Secure the left side of the mold to the machine’s platen using the four (4) provided shoulder bolts.

    • Secure the right side using the included set of clamping claws.

  2. Orientation: Ensure the top edge of the mold is perfectly flush with the top of Block 4 on the APSX-PIM.

  3. Alignment Check:

    • Use the manual control buttons to initiate the clamping cycle.

    • Carefully observe as the mold halves begin to engage.

    • HALT the machine immediately once alignment is initiated.

  4. Critical Safety Note: The pins and bushings are a tight, interference fit. They must be fully seated using the controlled force of the machine’s clamp. Do not attempt to press them together by hand, as this can cause injury or damage to components.

  5. Finalize Installation: Once aligned, complete the clamping cycle. The mold will make full contact with the nozzle plate only at the final clamp position, ensuring proper injection.

  • Brand APSX
  • Country of origin USA
  • Platform FIM
  • Ejector Pin Option Black, Red

Videos

Send Us a Message

Request a quote

Scan My Object

Please describe your part and scanning needs. Include details like size, material, and how you plan to use the 3D model. Let us know if you require additional services like digital sculpting. Upload images of your part(s) if you have them.

Ask for details

Partner with us

Get instant quote

Talk to Material Expert

Select the unit of measurement for your file
No 3D file? We’ve got you. We can design it for you or scan your existing part.
Upload a photo or drawing if you have one — we’ll get in touch soon.
Select the unit of measurement for your file
No 3D file? We’ve got you. We can design it for you or scan your existing part.
Upload a photo or drawing if you have one — we’ll get in touch soon.
Select the unit of measurement for your file
No 3D file? We’ve got you. We can design it for you or scan your existing part.
Upload a photo or drawing if you have one — we’ll get in touch soon.
Select the unit of measurement for your file
No 3D file? We’ve got you. We can design it for you or scan your existing part.
Upload a photo or drawing if you have one — we’ll get in touch soon.